Images are a great addition to a blog post, as they can help to illustrate a point, and help to break up the monotony of an all-text entry by adding some personality.
Because a blog is a web-based system, it is extremely important to resize and optimize all images for web delivery before uploading them!
This keeps your blog loading fast, and ensures you don’t eat up your blog quota too quickly.
Each blog has a maximum file space of 200MB.
Each file can be no larger than 2MB.
We recommend keeping images to 200KB or smaller, and hosting audio/visual content on a streaming server (like Google Drive or Youtube).
- Before you begin
- Add an image using the “Image” block
- About resizing and optimizing
- Additional resources
Before you begin
These steps are useful for anyone who is comfortable using an image editing program, such as Photoshop, Photoshop Express, iPhoto, Gimp, etc. Since each program is different, the instructions below are quite general – referring to the task, instead of the specific name of a tool or button in the program. Please refer to the help documents in your software as needed.
Prepare your image file
- Open your image in your image editing software of choice.
- Look at the dimensions of your image. Your blog post can only display the image at a certain size, so a 1000×1000 image will need to be cropped and/or resized in order to fit.
- Crop: Take a look at the image – is there anything that you can cut off of the image? Cropping tools are great for helping you focus on the most important part of the image.
- Resize: Once the image is cropped as much as it needs to be, it needs to be resized. Your image editing program will have tools that allow you to resize an image to an appropriate size.
- Web-ready format: Save the file to a lower resolution web-ready format. In general, photographs should be exported as .jpg files, while graphics work better when exported as .gif files, but there are also quality settings that you should compare and consider.
- Be realistic. The web is not the place for high-resolution images or video. If you need to include these in your blog post, consider uploading them to Google Drive first, then embedding them in the post.
Add an image using the “Image” block

- Click the plus symbol (+) in the upper-left corner of the editing window.
- From here, you will be presented with a number of options – the simplest thing to do is start typing the word ‘image’ into the search field. WordPress will show you any blocks that it thinks you may be interested in.
- Locate the ‘image’ block and click on it. This will place the new image block at the bottom of your document.
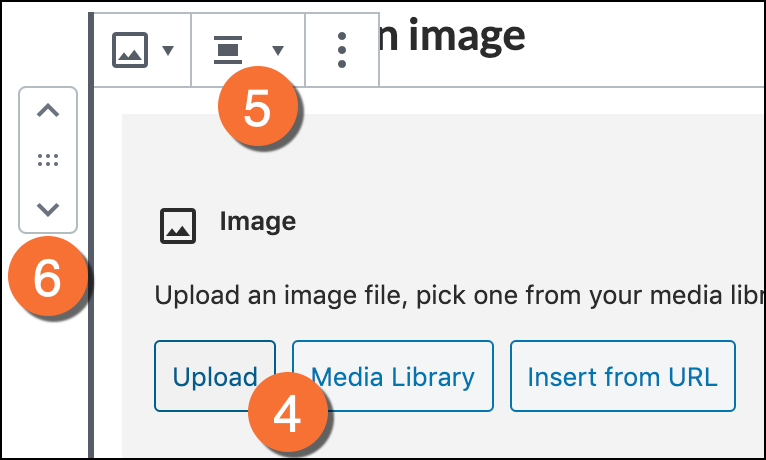
- If you have already uploaded the image to the blog, click “Media Library”, and select the image from the collection. If you need to upload the image from your computer, click the “Upload” button and follow the on-screen prompts to upload the image.
- When the image block is selected, you can choose to align the image centre, left or right.
- When the image block is selected, use the arrow icons on the left side to move the block up or down the page.
IMPORTANT!!! ADD ‘ALT’ TEXT
Immediately after uploading an image, look to the right-hand sidebar to add some important details. ‘Alt’ text describes the image for visitors with limited vision – this text is read to them using assistive devices.
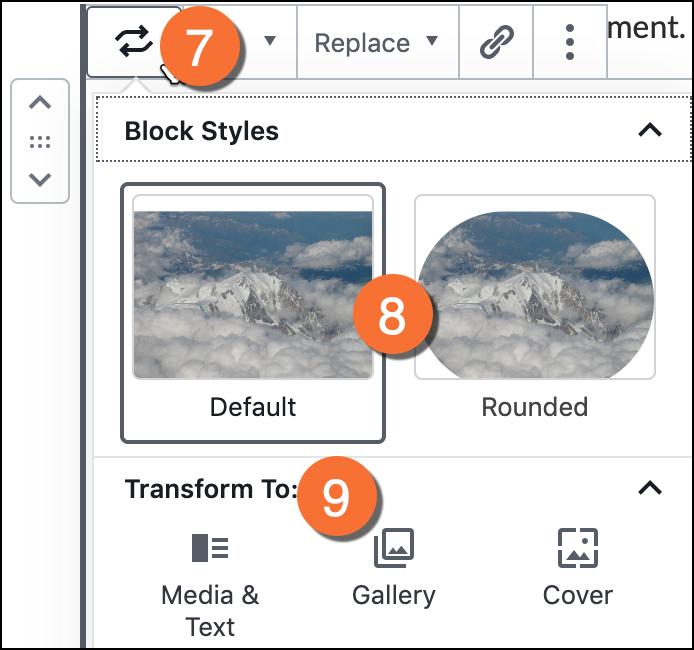
- When the image block is selected, click the icon in the top-left corner of the block for some additional style options.
- Choose to display the image in the default (rectangular) shape, or in a rounded shape.
- If you change your mind about the type of block you want to use to display this image, you can transform it to another image-related block type by clicking the block type at the bottom of the pop-up.
- Delete any unused images from your blog’s Media manager, to free up the space. Be careful not to upload duplicates of the same image!
About resizing and optimizing
Image Size
Your blog’s content area has a limited width, taking into account any sidebars that make up the full width on the right and/or left. That means you are limited to a certain width of image. It is important to make a version of your image that fits within this space before uploading it to the website.
To get the image to the proper width, you may choose to crop it, removing any unnecessary parts around the perimiter of the image. Otherwise, you can resize/scale the image.
Since different blog themes may have space for different sizes of image, you may need to try a couple of different sizes in order to find the best one.
Don’t forget to delete any old files from the Media folder, otherwise you are using your blog quota for images that aren’t even being used!
Optimize file size and format
Once you have cropped and/or resized your image to the appropriate size, you will need to save or export it in a format that is web-friendly. One of the most important parts of this process is to bring down the quality of the image, and therefore lower the filesize.
Your image file should be no larger than 100KB, preferably no larger than 50KB.
In general, JPG is the format used for photographic images, while GIF or PNG are used for graphics.